Remote Access (Secure) to Home Computer - (OpenWRT+No-IP+WireGuard)
5 minute read
What-is-this-Talking-About
This is a set of my working notes, barely polished. AI helped me organize my thought process and trial attempts, including the detours and final solutions, into a document format.
Actually, ever since I started my blog on Github Pages, I have naturally and happily added an extra step to my workflow: moving records from Obsidian into my Github Blog.
Environment: OpenWrt 23.05 Goal: Enable external access to internal network resources via WireGuard, ensuring automatic synchronization when the public IP changes.
Requirements
To implement remote access to the intranet, two things are mandatory:
- Our ISP must provide a public IP for our broadband (dynamic is fine), and the main router must obtain this public IP directly as the WAN address, avoiding multiple routing layers caused by optical modem NAT forwarding.
- We need a domain name that can be bound to our public IP.
Part 1: Review and Retrospective of the DDNS Phase
1. Encountered Bug (Failure Point)
- Phenomenon: Clicking “Update DDns Services List” forever displays
NO_LIST, making it impossible to selectno-ip.comfrom the dropdown menu.
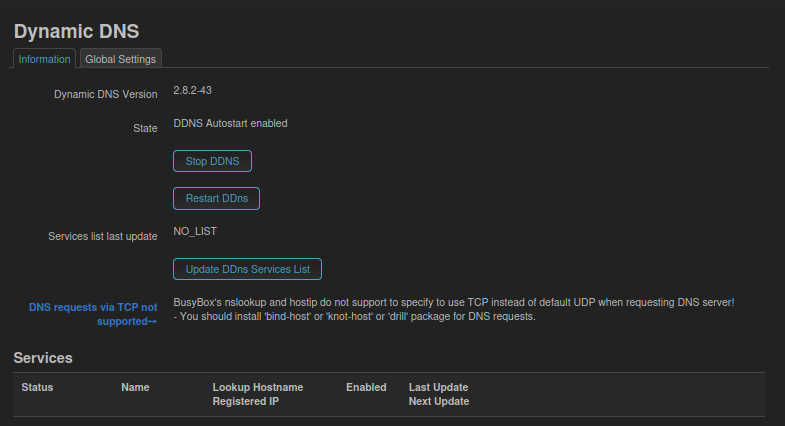
- Root Cause (Speculation):
- The OpenWrt firmware, due to being stripped-down or network issues, lacks HTTPS root certificates (
ca-certificates). - Or the router’s DNS is not yet configured properly, failing to resolve the server address for the download list.
- This causes
wgetorcurlcommands to fail when downloading service provider data packets from official OpenWrt sources.
- The OpenWrt firmware, due to being stripped-down or network issues, lacks HTTPS root certificates (
2. Workaround
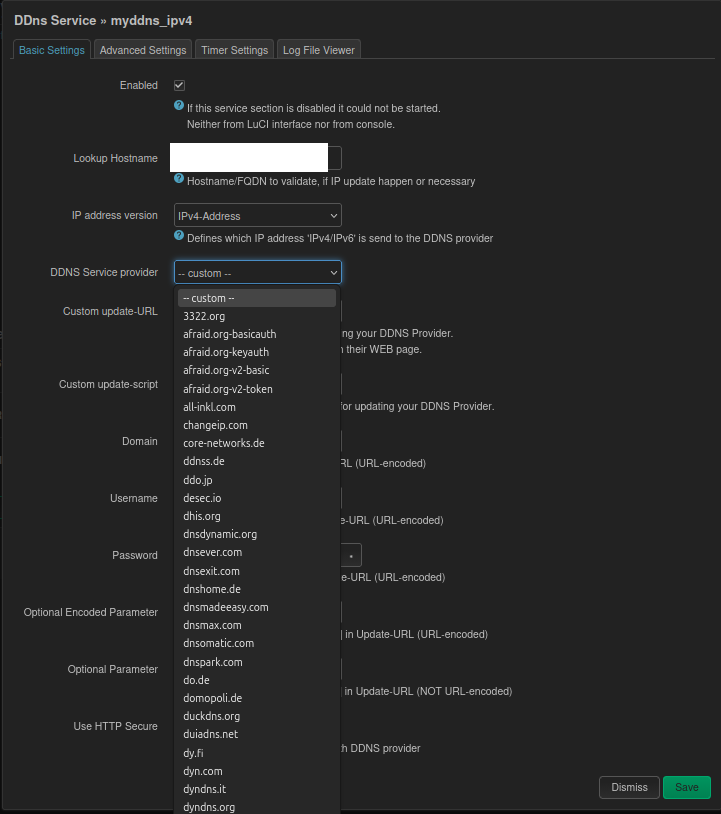
- What we did: We abandoned the “rely on preset list” automation path and switched to “manual mode” (Custom Mode).
- Key Actions:
- Set the service provider to
-- custom --. - Manually constructed the No-IP API update link:
http://[USERNAME]:[PASSWORD]@dynupdate.no-ip.com... - Critical Fix: Considering potential certificate issues, we used
http://instead ofhttps://and unchecked “Use HTTP Secure” to ensure a successful handshake even in an imperfect certificate environment.
3. Lessons Learned
In OpenWrt, the “Preset List” is just a convenient shortcut, not a necessity. As long as you know the provider’s API format, using Custom Mode is often faster and more direct than patching the system environment (installing certificates, troubleshooting network).
Part 2: WireGuard Server Configuration
1. Interface Settings
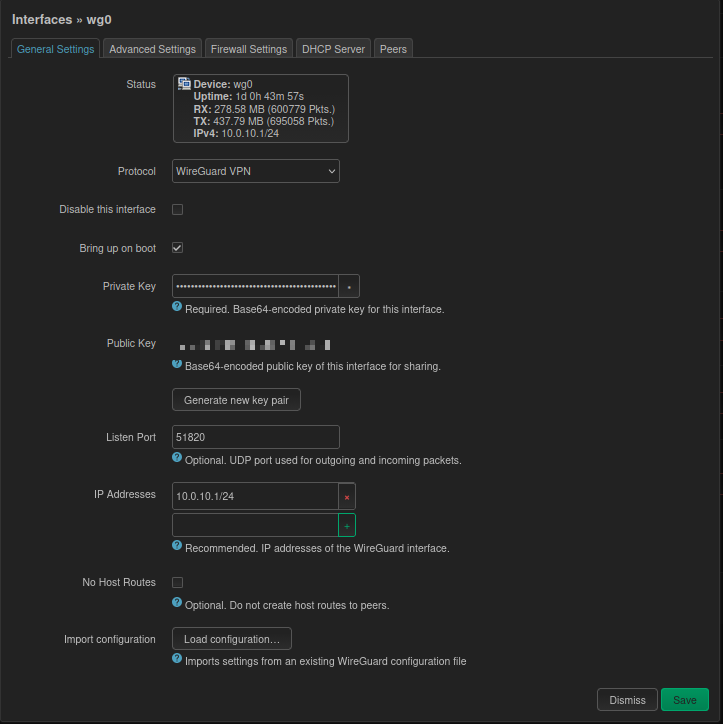
- Name:
wg0 - Private Key: Click Generate to create one. (Note: Do NOT click this button again afterwards, or all paired clients will become invalid).
- Listen Port:
51820 - IP Address:
10.0.10.1/24(VPN dedicated subnet)
2. Firewall Settings - Key Pitfall
This is the place most easily overlooked, leading to “connection failure”. Configuration is required in two places:
A. Zone Settings:
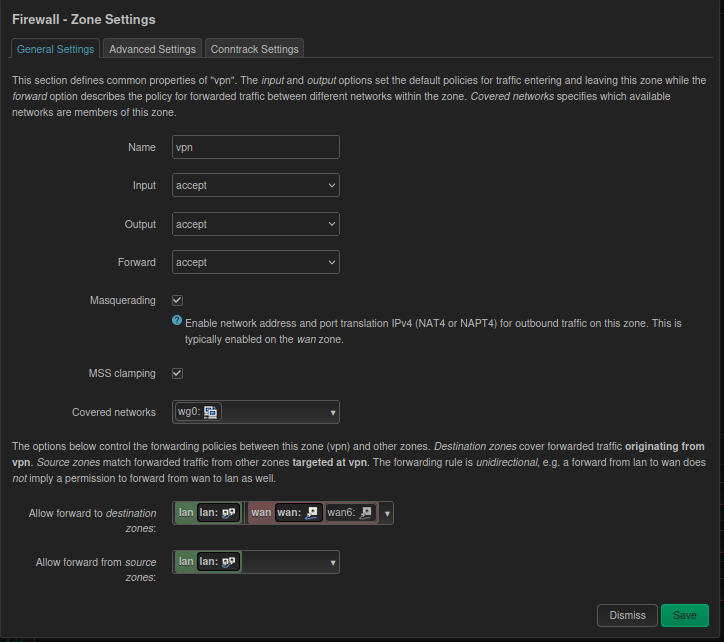
- Create a zone named
vpncontaining thewg0interface. - Input/Output/Forward: Set all to
Accept. - Masquerading: Must be checked (prevents return routing issues for intranet devices).
- MSS clamping: Recommended to check (solves issues with some webpages not loading).
- Forwarding: Must allow forwarding to
wan(internet access) andlan(intranet access).
B. Traffic Rules - Opening the Door:
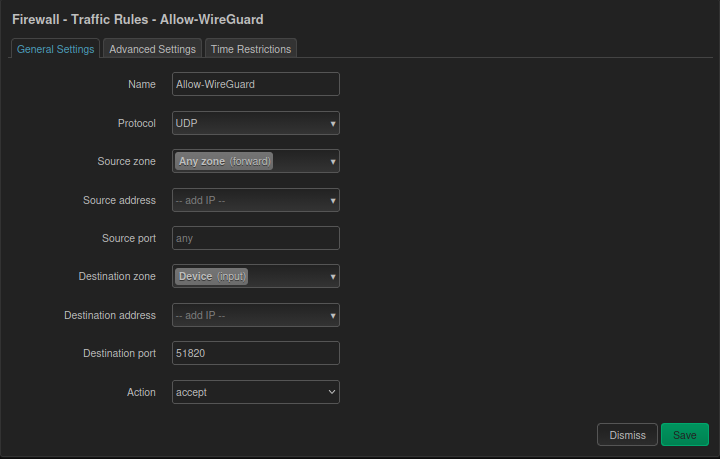 If this rule is missing, external traffic will be blocked directly.
- Protocol: UDP
- Source Zone: WAN
- Destination Zone: Device (Input) <– Note: it is Device, not LAN
- Destination Port: 51820
- Action: Accept
Part 3: Client (Peer) Configuration and Troubleshooting Retrospective
1. Standard Process for Adding a Peer
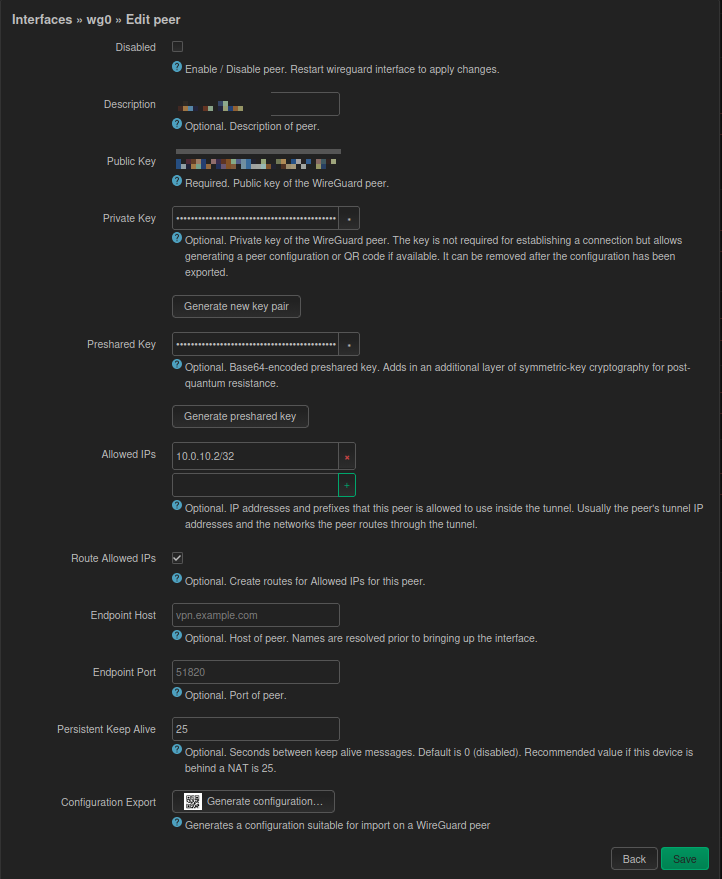 When adding a client in the OpenWrt interface, follow these specifications, otherwise it won’t connect:
- Public/Private Key: Click Generate when creating a new Peer.
- Allowed IPs: Assign a static IP, e.g.,
10.0.10.5/32. Note: You must press Enter or click the green+sign after typing to turn it into a gray capsule shape; otherwise, saving is invalid. - Route Allowed IPs: Must be checked (otherwise the routing table won’t take effect).
- Persistent Keep Alive: Must be 25 (solves the issue of stream dropping after a few minutes in NAT environments).
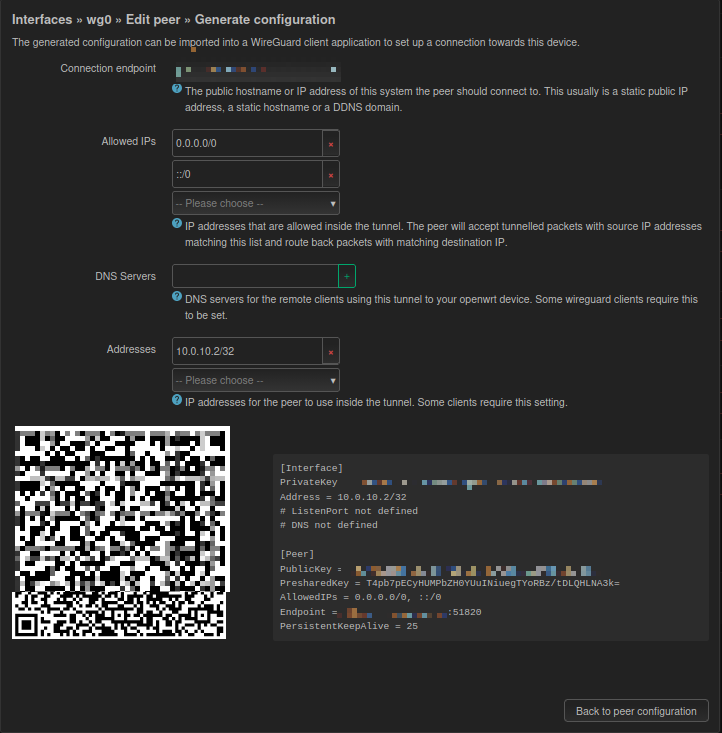
2. “Traps” and Fixes when Generating QR Codes
When clicking “Generate configuration” to create a QR code, two major pitfalls were encountered:
Trap 1: Endpoint Format Error
- Phenomenon: Entering
domain:51820in the Endpoint field causes OpenWrt to report “Invalid hostname” and fails to generate. - Solution: Enter only the pure domain
xxxx.ddns.netwhen generating, then create the QR code. - Remedy: After scanning with the phone, you must manually edit the configuration and append
:51820after the Endpoint domain.
- Phenomenon: Entering
Trap 2: Handshake Failure Caused by DNS (Metaphysical but Real)
- Phenomenon: If DNS is set to
192.168.0.1, connection cannot be established under 5G network; if set to8.8.8.8, occasional slow connection occurs. - Final Solution: Leave the DNS field blank when generating the QR code (or clear it directly on the phone).
- Principle: Leaving it blank uses the phone carrier’s DNS to resolve the domain, resulting in the fastest handshake speed. Once the connection is established, intranet access is unaffected.
- Phenomenon: If DNS is set to
3. Multi-Device Management Logic
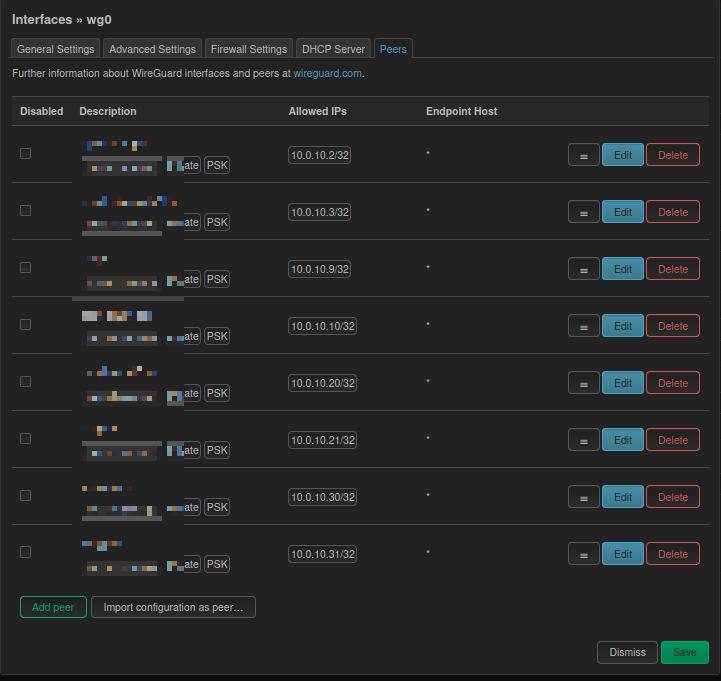
- Misconception: Attempted to assign multiple IPs (
.2,.3) to a single Peer for sharing among multiple devices. - Conclusion: Not feasible. WireGuard relies on public keys for identity verification. Sharing the same private key/configuration across multiple devices causes “route flapping” and kicking each other offline.
- Correct Approach: One device = One Peer = One independent IP. If there are 10 devices, 10 Peers must be created (Phone1, Phone2, Laptop…).
Part 4: Maintenance Memo (Blood and Tears Experience)
About Key Updates: The “Generate new key pair” button in the
wg0interface main screen (General Settings) is a self-destruct button. Once clicked and saved by mistake, the router’s public key changes, and all distributed phone clients will disconnect and must rescan the code. Operating Principle: Unless resetting for security, never click this button.About Configuration Activation: After adding a new Peer, if the phone cannot complete the handshake (no data received) after scanning, do not obsess over the configuration. Action: Go to the Interfaces list, execute Stop -> (wait 3 seconds) -> Start on
wg0. This forces a refresh of the Peer list in memory.Current Topology:
- Router IP: 10.0.10.1
- Phone2 (Peer 1): 10.0.10.3 (Normal)
- Phone3 (Peer 2): 10.0.10.5 (DNS left blank, Normal)